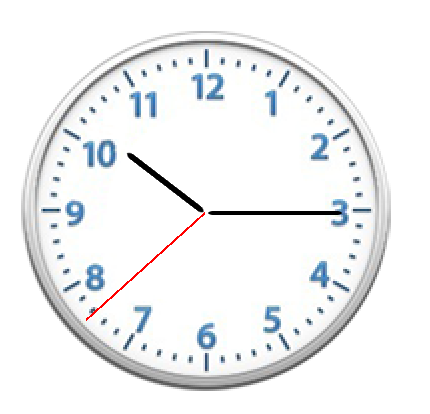
文章目录
  1. 1. 核心动画
    1. 1.1. CAlayer 对象
    2. 1.2. UIImageView图层
    3. 1.3. CALayer注意事项
      1. 1.3.1. CALayer和UIView的选择
    4. 1.4. 手动创建图层
    5. 1.5. 隐式动画
    6. 1.6. 简单钟表实现
      1. 1.6.1. 绘制秒针、时针、分针
    7. 1.7. 基本动画 CABasicAnimation
    8. 1.8. 关键帧动画 CAKeyframeAnimation
    9. 1.9. 转场动画 CATransition
    10. 1.10. 动画组:CAAnimationGroup
    11. 1.11. 渐变图层 - CAGradientLayer
    12. 1.12. 复制图层 - CAReplicatorLayer
      1. 1.12.1. 音量振动条
      2. 1.12.2. 动态加载
      3. 1.12.3. 粒子效果
      4. 1.12.4. 倒影
    13. 1.13. 不规则图形图层 CAShapeLayer

核心动画

  • 注意事项 :locationInView和translationInView
// 返回相对于控件自身内部触摸点的位置
[pan locationInView:self];
// 返回两个触摸点之间的偏移量,这个是偏移量,其实和具体的控件关系不大
CGPoint curP = [pan translationInView:self];

CAlayer 对象

  • 在创建UIView对象时,UIView内部会自动创建一个图层(即CALayer对象),通过UIView的layer属性可以访问这个层

    @property(nonatomic,readonly,retain) CALayer *layer;

  • 例如:

// 1 阴影
// 阴影不透明度,默认是0
_redView.layer.shadowOpacity = 10;
// 注意:图层的颜色都是核心绘图框架,通常:CGColor,要进行类型转换
_redView.layer.shadowColor = [UIColor blueColor].CGColor;
_redView.layer.shadowOffset = CGSizeMake(10, 10);
_redView.layer.shadowRadius = 10;
// 2 边框
_redView.layer.borderWidth = 5;
_redView.layer.borderColor = [UIColor yellowColor].CGColor;

UIImageView图层

// UIImageView的图层属性
_imageView.layer.borderWidth = 3;
_imageView.layer.borderColor = [UIColorblueColor].CGColor;
// // 阴影
// _imageView.layer.shadowOpacity = 1; // 不透明
// _imageView.layer.shadowOffset = CGSizeMake(10, 10);
// _imageView.layer.shadowColor = [[UIColor purpleColor] CGColor];
// 圆角,默认不会裁切为圆形
_imageView.layer.cornerRadius = 50;
// 设置这个参数可以使超出圆角的部分强制裁切
_imageView.layer.masksToBounds = YES;

CALayer注意事项

  • CALayer是定义在QuartzCore框架中的

  • CGImageRef、CGColorRef两种数据类型是定义在CoreGraphics框架中的

  • UIColor、UIImage是定义在UIKit框架中的

  • QuartzCore框架和CoreGraphics框架是可以跨平台使用的,在iOS和Mac OS X上都能使用
  • 但是UIKit只能在iOS中使用
  • 为了保证可移植性,QuartzCore不能使用UIImage、UIColor,只能使用CGImageRef、CGColorRef

CALayer和UIView的选择

  • 对比CALayer,UIView多了一个事件处理的功能。也就是说,CALayer不能处理用户的触摸事件,而UIView可以
    所以,如果显示出来的东西需要跟用户进行交互的话,用UIView;如果不需要跟用户进行交互,用UIView或者CALayer都可以

  • 图层的形变属性transform

- (void)touchesBegan:(NSSet *)touches withEvent:(UIEvent *)event
{
_redView.layer.transform = CATransform3DMakeScale(0.5, 0.5, 1);
CGFloat angle = arc4random_uniform(360)/180.0*M_PI; // 随机角度
[UIView animateWithDuration:1animations:^{
_redView.layer.transform = CATransform3DMakeRotation(angle, 0, 0, 1);
_redView.layer.transform = CATransform3DMakeTranslation(100, 100, 100);
// _redView.layer.transform = CATransform3DMakeScale(1, 1, 1);
// 也可以使用KVC进行属性监视,但是有时可能出现一些莫名其妙的问题
[_redView.layer setValue:@(angle) forKeyPath:@"transform.scale"];
}];
}

手动创建图层

// 手动创建图层
CALayer *layer = [CALayer layer];
layer.bounds = CGRectMake(0, 0, 100, 100);
// 起始点 position
layer.position = CGPointMake(100, 100);
// 锚点 anchorPoint,在图层内部的某个点,决定这position显示的点
layer.anchorPoint = CGPointMake(0,0);
layer.anchorPoint = CGPointMake(0.5,1);
layer.anchorPoint = CGPointMake(1,0.5);
layer.backgroundColor = [UIColor redColor].CGColor;
// 如过想图层中添加图片,需要添加到属性contents中,返回类型是CGImageRef
layer.contents = (id)[[UIImage imageNamed:@"阿狸头像"] CGImage];
// 将图层添加到子图层
[self.view.layer addSublayer:layer];

隐式动画

  • 每一个UIView内部都默认关联着一个CALayer,我们可用称这个Layer为Root Layer(根层)
  • 所有的非Root Layer,也就是手动创建的CALayer对象,都存在着隐式动画
  • 当对非Root Layer的部分属性进行修改时,默认会自动产生一些动画效果
  • 而这些属性称为Animatable Properties(可动画属性)
    具体哪个属性修改可以产生动画,可以直接在头文件里看到Animatable 只要介绍里含有Animatable 都可以产生动画
/* The background color of the layer. Default value is nil. Colors
* created from tiled patterns are supported. Animatable. */
@property CGColorRef backgroundColor;
// 常见属性
- (void)touchesBegan:(NSSet *)touches withEvent:(UIEvent *)event
{
// 常见带有动画的属性
CGFloat angle = arc4random_uniform(360)/180.0*M_PI; // 随机角度
_redView.layer.transform = CATransform3DRotate(_redView.layer.transform, angle, 0, 0, 1);
_redView.layer.transform = CATransform3DTranslate(_redView.layer.transform, arc4random_uniform(50), arc4random_uniform(50), 1);
// _redView.layer.transform = CATransform3DScale(_redView.layer.transform, arc4random_uniform(10)/10.0,arc4random_uniform(10)/10.0, 1);
_redView.layer.borderWidth = arc4random_uniform(5) + 1;
_redView.layer.borderColor = [selfrandomColor].CGColor;
_redView.layer.shadowOpacity = 1;
_redView.layer.shadowOffset = CGSizeMake(10, 10);
_redView.layer.shadowRadius = arc4random_uniform(10);
_redView.layer.cornerRadius = arc4random_uniform(50);
}

简单钟表实现

绘制秒针、时针、分针

  • 添加三个图层表示时分秒,因为不需要响应事件所以使用图层
@property (weak, nonatomic) IBOutletUIImageView *clockImage;
@property (strong, nonatomic) CALayer *secondLayer;
@property (strong, nonatomic) CALayer *minuteLayer;
@property (strong, nonatomic) CALayer *hourLayer;
  • 设置时分秒针显示的位置以及大小
// 设置秒针
- (void)setSecond
{
// 秒针
_secondLayer = [CALayerlayer];
// 边界大小
_secondLayer.bounds = CGRectMake(0, 0, 1, kClockH/2 - 20);
// 背景色
_secondLayer.backgroundColor = [UIColor redColor].CGColor;
// 位置
_secondLayer.position = CGPointMake(kClockH/2, kClockH/2);
// 锚点
_secondLayer.anchorPoint = CGPointMake(0.5, 1);
// 添加到图层
[self.clockImage.layer addSublayer:_secondLayer];
}
// 设置分针
- (void)setMinute
{
// 分针
_minuteLayer= [CALayerlayer];
_minuteLayer.bounds = CGRectMake(0, 0, 2, kClockH/2 - 30);
_minuteLayer.cornerRadius = 4;
_minuteLayer.backgroundColor = [UIColor blackColor].CGColor;
_minuteLayer.position = CGPointMake(kClockH/2, kClockH/2);
_minuteLayer.anchorPoint = CGPointMake(0.5, 1);
_minuteLayer.transform = CATransform3DMakeRotation(M_PI_2, 0, 0, 1);
[self.clockImage.layer addSublayer:_minuteLayer];
}
// 设置时针
- (void)setHour
{
// 时针
_hourLayer = [CALayer layer];
_hourLayer.bounds = CGRectMake(0, 0, 3, kClockH/2 - 50);
_hourLayer.cornerRadius = 4;
_hourLayer.backgroundColor = [UIColor blackColor].CGColor;
_hourLayer.position = CGPointMake(kClockH/2, kClockH/2);
_hourLayer.anchorPoint = CGPointMake(0.5, 1);
_hourLayer.transform = CATransform3DMakeRotation(M_PI, 0, 0, 1);
[self.clockImage.layer addSublayer:_hourLayer];
}
  • 设置一个定时器,定时刷新每个表针的位置
- (void)viewDidLoad
{
[superviewDidLoad];
[self setMinute];
[self setHour];
[self setSecond];
// 添加定时器
[NSTimer scheduledTimerWithTimeInterval:1target:self selector:@selector(timeChange) userInfo:nil repeats:YES];
}
  • 刷新表针的方法
// 定时器实现
- (void)timeChange
{
// 获取系统时间
NSCalendar *calendar = [NSCalendar currentCalendar];
// 获取时间:时分秒
// 获取日期的组件:年月日小时分秒
// components:需要获取的日期组件
// fromDate:获取哪个日期的组件
// 经验:以后枚举中有移位运算符,通常一般可以使用并运算(|)
NSDateComponents *comp = [calendar components:NSCalendarUnitSecond | NSCalendarUnitMinute | NSCalendarUnitHourfromDate:[NSDatedate]];
NSLog(@"timeChange:%@",comp);
// 获取秒
NSInteger sec = comp.second;
// 获取分
NSInteger minute = comp.minute;
// 获取小时
NSInteger hour = comp.hour;
// 秒针当前的弧度
CGFloat secondAngle = (perSecondA * sec) / 180.0 * M_PI;
// 分针当前的弧度
CGFloat minuteAngle = (perMinuteA * minute) / 180.0 * M_PI;
// 时针当前的弧度
CGFloat hourAngle = (perHourA * hour + perMinuteHourA * minute) / 180.0 * M_PI;
// 旋转秒针
_secondLayer.transform = CATransform3DMakeRotation(secondAngle, 0, 0, 1);
// 旋转分针
_minuteLayer.transform = CATransform3DMakeRotation(minuteAngle, 0, 0, 1);
// 旋转时针
_hourLayer.transform = CATransform3DMakeRotation(hourAngle, 0, 0, 1);
}
  • 还有几个宏
#define kClockH (_clockImage.bounds.size.height)
// 一秒钟秒针转6°
#define perSecondA 6
// 一分钟分针转6°
#define perMinuteA 6
// 一小时时针转30°
#define perHourA 30
// 每分钟时针转多少度
#define perMinuteHourA 0.5

基本动画 CABasicAnimation

- (void)touchesBegan:(NSSet *)touches withEvent:(UIEvent *)event
{
// 创建动画
CABasicAnimation *anim = [CABasicAnimation animation];
// 描述动画的属性
anim.keyPath = @"position";
// anim.keyPath = @"transform.scale";
// 动画延迟2s执行
// anim.beginTime = CACurrentMediaTime() + 2;
// 属性改变的值
anim.toValue = [NSValue valueWithCGPoint:CGPointMake(300, 200)];
// 重读次数
anim.repeatCount = 10;
// 取消动画反弹,默认为yes,动画执行完毕后恢复原状,为NO时表示动画执行结束显示动画最后的状态
anim.removedOnCompletion = YES;
// 保持动画最后的状态
anim.fillMode = kCAFillModeForwards;
[self.blueView.layer addAnimation:anim forKey:nil];
}

关键帧动画 CAKeyframeAnimation

#import "DrawView.h"

@interfaceDrawView()
@property (nonatomic, strong) UIBezierPath *path;

@end

@implementation DrawView

// 绘制一条路径
-(void)touchesBegan:(NSSet *)touches withEvent:(UIEvent *)event
{
UITouch *tou = [touches anyObject];
CGPoint curP = [tou locationInView:self];

_path = [UIBezierPath bezierPath];

[_path moveToPoint:curP];
}
- (void)touchesMoved:(NSSet *)touches withEvent:(UIEvent *)event
{
UITouch *tou = [touches anyObject];
CGPoint curP = [tou locationInView:self];

[_path addLineToPoint:curP];

[self setNeedsDisplay];
}

- (void)touchesEnded:(NSSet *)touches withEvent:(UIEvent *)event
{
// 按照路径进行移动
CAKeyframeAnimation *keyframeAnim = [CAKeyframeAnimation animation];
keyframeAnim.keyPath = @"position";
keyframeAnim.path = (_path.CGPath); // 转换路径格式
keyframeAnim.duration = 1;
keyframeAnim.repeatCount = 3;
keyframeAnim.fillMode = kCAFilterLinear;
[[[self.subviewsfirstObject] layer] addAnimation:keyframeAnim forKey:nil];
}
- (void)drawRect:(CGRect)rect
{
// 绘制路径
[_path stroke];
}
@end

转场动画 CATransition

// 三张图片切换显示
static int i = 2;
- (void)touchesBegan:(NSSet *)touches withEvent:(UIEvent *)event
{
// 转场动画
if (i == 4) {
i = 1;
}
NSString *imageName = [NSString stringWithFormat:@"%d",i];

_imageView.image = [UIImage imageNamed:imageName];

i ++;
// 转场动画
CATransition *transition = [[CATransition alloc] init];
transition.type = @“rippleEffect”; // 动画类型
transition.duration = 2;
[self.imageView.layer addAnimation:transition forKey:nil];
}

动画组:CAAnimationGroup

//CAAnimationGroup 动画组:给一个图层添加多个动画
- (void)touchesBegan:(NSSet *)touches withEvent:(UIEvent *)event
{
CAAnimationGroup *grounp = [CAAnimationGroup animation];
CABasicAnimation *animPosition= [CABasicAnimation animation];
// 描述动画的属性
animPosition.keyPath = @"position";
// 属性改变的值
animPosition.toValue = [NSValuevalueWithCGPoint:CGPointMake(arc4random_uniform(300),arc4random_uniform(200))];

CABasicAnimation *animScale= [CABasicAnimation animation];
// 描述动画的属性
animScale.keyPath = @"transform.scale";
// 属性改变的值
animScale.toValue = @0.5;

CABasicAnimation *animRotate= [CABasicAnimation animation];
// 描述动画的属性
animRotate.keyPath = @"transform.rotation";
// 属性改变的值
animRotate.toValue = @(arc4random_uniform(M_PI));

// 添加到动画组
grounp.animations = @[animPosition,animRotate,animScale];

[self.imageView.layer addAnimation:grounp forKey:nil];
}
  • **注意:核心动画一切都是假象,并不会真实的改变图层的属性值,如果以后做动画的时候,不需要与用户交互,通常用核心动画(转场)。
  • UIView动画必须通过修改属性的真实值,才有动画效果。
    **

渐变图层 - CAGradientLayer

  • 实现这种效果需要将一张图片拆分成两张,直接使用两个imageView

  • 然后添加一个响应手势的UIView,大小和图片大小一致。

    -图层的属性contentsRect 使用注意:取值范围0~1

// 通过设置contentsRect可以设置图片显示的尺寸,取值0~1
// 获取上半部分
_topView.layer.contentsRect = CGRectMake(0, 0, 1, 0.5);
_topView.layer.anchorPoint = CGPointMake(0.5, 1);
// 显示下半部分
_bottomView.layer.contentsRect = CGRectMake(0, 0.5, 1, 0.5);
_bottomView.layer.anchorPoint = CGPointMake(0.5, 0);
// 添加滑动手势
UIPanGestureRecognizer *pan = [[UIPanGestureRecognizer alloc] initWithTarget:self action:@selector(pan:)];

[self.dragView addGestureRecognizer:pan];

// 渐变图层
CAGradientLayer *layer = [CAGradientLayerlayer];
layer.frame = self.bottomView.bounds; // 渐变图层位置和尺寸
layer.opacity = 0; // 透明
// 添加渐变色
layer.colors = @[(id)[UIColor clearColor].CGColor,(id)[UIColorblackColor].CGColor];

_gradientLayer = layer;
// 添加到底部
[self.bottomView.layer addSublayer:layer];

- (void)pan:(UIPanGestureRecognizer *)pan
{
// 图片高度
CGFloat imageH = _dragView.bounds.size.width;
CGPoint curP = [pan translationInView:self.dragView];
// 旋转角度
CGFloat angle = - curP.y / imageH *M_PI;
// 默认原始位置
CATransform3D transform = CATransform3DIdentity;
// 增加旋转的立体感,近大远小,d:距离图层的距离
transform.m34 = -1 / 500.0 ;
// 旋转
transform = CATransform3DRotate(transform, angle, 1, 0, 0);
self.topView.layer.transform = transform;

// 设置阴影效果
self.gradientLayer.opacity = curP.y / imageH;

// 手指抬起后将图片反弹
if (pan.state == UIGestureRecognizerStateEnded) {

[UIViewanimateWithDuration:0.5delay:0usingSpringWithDamping:0.2initialSpringVelocity:10options:UIViewAnimationOptionCurveEaseInOutanimations:^{
// topView恢复原状
self.topView.layer.transform = CATransform3DIdentity;
// 阴影恢复原状
self.gradientLayer.opacity = 0;
} completion:^(BOOL finished) {
}];
}
}

复制图层 - CAReplicatorLayer

  • 可以复制非根层的所有子层

音量振动条

- (void)createLayerWithColor:(UIColor *)color anchorPoint:(CGPoint )point frame:(CGRect)rect
{
// 复制图层 CAReplicatorLayer
CAReplicatorLayer *replicator = [CAReplicatorLayer layer];
// 必须设置尺寸
replicator.frame = self.imageView.bounds;
[self.imageView.layer addSublayer:replicator];
// 创建图层
CALayer *layer = [CALayer layer];
layer.backgroundColor = color.CGColor;
// 注意设置锚点和frame的顺序,先设置锚点再设置位置
layer.anchorPoint = point;
layer.frame = rect;;
// 添加图层动画
CABasicAnimation *anim = [CABasicAnimation animation];
anim.keyPath = @"transform.scale.y"; // 只改变y值
anim.fromValue = @(0);
anim.toValue = @(1);
anim.repeatCount = MAXFLOAT;
anim.duration = 0.5;
anim.autoreverses = YES; // 自动反转动画
[layer addAnimation:anim forKey:nil];
// 将图层添加到复制图层
[replicator addSublayer:layer];
// 复制图层总个数,包括原图层
replicator.instanceCount = 6;
// 图层之间显示的延迟
replicator.instanceDelay = 0.3;
// 图层之间的距离或者其他属性
replicator.instanceTransform = CATransform3DMakeTranslation(50, 0, 0);
// 如果设置了原始层背景色,就不需要设置这个属性
replicator.instanceRedOffset = - 0.4;
}

动态加载

// 复制层
CAReplicatorLayer *repl = [CAReplicatorLayer layer];
repl.frame = self.imageView.bounds;
[self.imageView.layer addSublayer:repl];
// 一般层
CALayer *layer = [CALayer layer];
// layer.anchorPoint = CGPointMake(0.5, 1);
// 一开始不想显示的话就先隐藏
layer.transform = CATransform3DMakeScale(0, 0, 0);
layer.frame = CGRectMake((self.imageView.bounds.size.width-20)/2, 0, 20, 20);
layer.backgroundColor = [UIColorredColor].CGColor;
layer.cornerRadius = 10;
CABasicAnimation *anim = [CABasicAnimation animation];
anim.keyPath = @"transform.scale";
anim.fromValue = @(1);
anim.toValue = @(0);
anim.repeatCount = MAXFLOAT;
CGFloat duraton = 1;
anim.duration = duraton;
[layer addAnimation:anim forKey:nil];
[repl addSublayer:layer];
repl.instanceCount = kViewCount;
CGFloat angle = M_PI * 2 / kViewCount;
repl.instanceTransform = CATransform3DMakeRotation(angle, 0, 0, 1);
repl.instanceDelay = duraton / kViewCount;
}

粒子效果

  • 使用关键帧动画可以实现跟随粒子效果

#import "DrawView.h"

@interfaceDrawView ()
@property (nonatomic, strong) UIBezierPath *path;
@property (weak, nonatomic) IBOutletUIImageView *imageView;
@property (weak, nonatomic) CAReplicatorLayer *repl;
@property (weak, nonatomic) CALayer *dotLayer;
@end

@implementation DrawView
//
- (CALayer *)dotLayer
{
if (_dotLayer == nil) {
CALayer *layer = [CALayer layer];
// 初始显示到屏幕以外位置
layer.frame = CGRectMake(1100, 0, 20, 20);
layer.cornerRadius = 15;
layer.backgroundColor = [UIColor whiteColor].CGColor;
layer.shadowOpacity = 0.5;
layer.shadowOffset = CGSizeMake(3, 3);
layer.shadowColor = [self randomColor].CGColor;
_dotLayer = layer;
[_repl addSublayer:_dotLayer];
}
return_dotLayer;
}
- (UIColor *)randomColor
{
CGFloat r = arc4random_uniform(256)/255.0;
CGFloat g = arc4random_uniform(256)/255.0;
CGFloat b = arc4random_uniform(256)/255.0;
return [UIColorcolorWithRed:r green:g blue:b alpha:1];
}
// 只加载一次,将所有线全部保存在一个路径中
- (UIBezierPath *)path
{
if (_path == nil) {
_path = [UIBezierPath bezierPath];
}
return _path;
}

- (void)touchesBegan:(NSSet *)touches withEvent:(UIEvent *)event
{
UITouch *tou = [touches anyObject];
CGPoint curP = [tou locationInView:self];
[self.path moveToPoint:curP];
}
static int count = 0; // 复制子层个数
- (void)touchesMoved:(NSSet *)touches withEvent:(UIEvent *)event
{
UITouch *tou = [touches anyObject];
CGPoint curP = [tou locationInView:self];
[self.path addLineToPoint:curP];
[selfsetNeedsDisplay];
count ++;
}
- (void)start
{
CAKeyframeAnimation *anim = [CAKeyframeAnimationanimation];
anim.keyPath = @"position";
anim.path = self.path.CGPath;
anim.duration = 3;
anim.repeatCount = MAXFLOAT;

[self.dotLayeraddAnimation:anim forKey:nil];

[_repladdSublayer:self.dotLayer];
// 注意:如果复制的子层有动画,先添加动画,在复制
// 复制子层
self.repl.instanceCount = count;
self.repl.instanceDelay = 0.2;
// _repl.instanceTransform = CATransform3DMakeRotation(M_PI,1, 0,0);
_repl.instanceTransform = CATransform3DMakeScale(1, 0.3, 1);
// _repl.instanceTransform = CATransform3DMakeTranslation(10, 3, 0);
// self.repl.instanceRedOffset = - 0.1;
// self.repl.instanceBlueOffset = - 0.1;
// self.repl.instanceGreenOffset = - 0.1;
self.repl.instanceColor = [selfrandomColor].CGColor;
}


- (void)redraw
{
// 清空路径
self.path = nil;
[self setNeedsDisplay];
// 移除子层
[_dotLayer removeFromSuperlayer];
_dotLayer = nil;
// 计数清零
count = 0;
}
- (void)awakeFromNib
{
// 显示粒子
CAReplicatorLayer *repl = [CAReplicatorLayerlayer];
repl.frame = self.bounds;


[self.layer addSublayer:repl];
_repl = repl;
}

// Only override drawRect: if you perform custom drawing.
// An empty implementation adversely affects performance during animation.
- (void)drawRect:(CGRect)rect {
// Drawing code
[self.path stroke];
}

@end

倒影

  • 通过复制图层复制多个照片图层,然后设置属性。
// 复制子层
CAReplicatorLayer *repl = (CAReplicatorLayer *)_imageRootView.layer;


repl.instanceCount = 4;
CGFloat angel = 0;
for (int i = 0 ; i < 4 ; i ++) {
angel = i * M_PI_2;
CATransform3D transform = CATransform3DMakeTranslation(-_imageView.bounds.size.width,_imageView.bounds.size.height * 2, 0);
transform = CATransform3DRotate(transform,angel,0 , 0,1);


// 平移并旋转
repl.instanceTransform = transform;
}
// 添加一个阴影效果
repl.instanceRedOffset = - 0.1;
repl.instanceGreenOffset = - 0.1;
repl.instanceBlueOffset = - 0.1;
repl.instanceAlphaOffset = - 0.1;

不规则图形图层 CAShapeLayer

  • 可以绘制各种不规则图形,指定路径和填充颜色
@propertyCGPathRef path;
@property CGColorRef fillColor;
直接指定路径可以绘制。不需要在drawRect中绘制。
// 展示不规则矩形,通过不规则矩形路径生成一个图层
CAShapeLayer *layer = [CAShapeLayerlayer];
layer.fillColor = self.backgroundColor.CGColor;
_shapeLayer = layer;
[self.superview.layer insertSublayer:_shapeLayer below:self.layer];
文章目录
  1. 1. 核心动画
    1. 1.1. CAlayer 对象
    2. 1.2. UIImageView图层
    3. 1.3. CALayer注意事项
      1. 1.3.1. CALayer和UIView的选择
    4. 1.4. 手动创建图层
    5. 1.5. 隐式动画
    6. 1.6. 简单钟表实现
      1. 1.6.1. 绘制秒针、时针、分针
    7. 1.7. 基本动画 CABasicAnimation
    8. 1.8. 关键帧动画 CAKeyframeAnimation
    9. 1.9. 转场动画 CATransition
    10. 1.10. 动画组:CAAnimationGroup
    11. 1.11. 渐变图层 - CAGradientLayer
    12. 1.12. 复制图层 - CAReplicatorLayer
      1. 1.12.1. 音量振动条
      2. 1.12.2. 动态加载
      3. 1.12.3. 粒子效果
      4. 1.12.4. 倒影
    13. 1.13. 不规则图形图层 CAShapeLayer